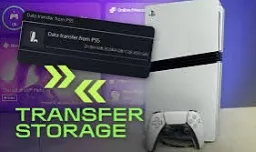
Step-by-step Guide For Data Transfer From Ps5 To Ps5 Pro
Upgrading from a PlayStation 5 (PS5) to the new PlayStation 5 Pro (PS5 Pro) can be an exciting leap into enhanced gaming. However, if you’re a seasoned PS5 gamer, you’ll want to transfer all your saved games, settings, and downloaded content from your current PS5 to your new PS5 Pro. Fortunately, Sony has made it relatively simple to transfer data between the two consoles. This step-by-step guide will walk you through the process, covering everything from preparation to troubleshooting. With the right approach, you’ll have all your data on your PS5 Pro in no time and can dive right back into gaming.
Step 1: Prepare Both Consoles
Before starting the transfer process, it’s essential to prepare both the PS5 and PS5 Pro. Here’s what you’ll need to do:
Ensure Both Consoles Are Updated: Connect both consoles to the internet, then go to Settings > System > System Software > System Software Update and Settings to check for any updates. Keeping both consoles updated helps prevent potential compatibility issues during the transfer.
Sign In to the Same PlayStation Account: Make sure you’re signed in with the same PlayStation Network (PSN) account on both consoles. If you haven’t already, sign in with your PSN account on the PS5 Pro.
Check Storage Space: Ensure the PS5 Pro has enough available storage to accommodate the data from your PS5. If the PS5 Pro’s storage is limited, you may need to delete some games or media to free up space temporarily.
Step 2: Connect Both Consoles to the Same Network
The data transfer between the PS5 and PS5 Pro requires both consoles to be on the same network. You have two options for connecting them:
Wi-Fi Connection: You can connect both consoles to the same Wi-Fi network. This method is convenient but may be slower, depending on your network speed.
LAN (Ethernet) Cable Connection: If you have a LAN cable and both consoles are close enough, connect them directly using the LAN cable. This option provides a more stable and faster transfer than Wi-Fi.
If you’re using Wi-Fi, ensure both consoles are connected to the strongest signal available. For the fastest transfer, connect each console to the network using a separate Ethernet cable, especially if you have a router with multiple LAN ports.
Step 3: Start the Data Transfer Process on Your PS5 Pro
The transfer process will be initiated on the PS5 Pro, as it’s receiving data from the PS5.
Go to Settings: On the PS5 Pro, navigate to Settings from the home screen.
Select System: Go to System > System Software > Data Transfer.
Choose Transfer from Your PS5: You’ll see an option to start the data transfer from another PS5 console. Select this option and follow the on-screen instructions.
Confirm the Data Transfer: Once you begin the data transfer, both consoles will display a confirmation prompt. Make sure to confirm the transfer on both consoles before proceeding.
Step 4: Select the Data You Want to Transfer
Once the transfer process begins, you’ll have the option to choose specific data to transfer from your PS5 to the PS5 Pro.
Game Files: Select which games you want to transfer. If you have a large library, consider transferring only the games you play frequently to speed up the process. You can redownload other games from the PlayStation Store later if needed.
Save Data: Choose any save data you want to bring to your new console. This data is typically small in size, so it won’t impact the transfer time much.
Screenshots and Video Clips: If you have many screenshots and clips, this data could add significantly to the transfer time. Select only the essential media files, especially if you’re using Wi-Fi.
User Profile Settings: This includes your customized settings and user preferences, ensuring that your new console feels just like the original when you start it up.
After selecting what you want to transfer, confirm your selection, and proceed.
Step 5: Start the Transfer and Wait for Completion
Once you’ve made your selection, start the transfer. The PS5 Pro will begin copying data from your PS5.
Monitor Progress: The consoles will display a progress bar showing the percentage of the transfer completed. Depending on your network connection and the amount of data being transferred, the process could take anywhere from 10 minutes to several hours.
Avoid Interruptions: Keep both consoles turned on and avoid running other applications or downloads during the transfer. Interrupting the transfer could result in data loss or corruption, so let the consoles complete the process without interference.
If you’re using a direct LAN connection, the transfer will generally be faster and more stable than Wi-Fi. For example, transferring 100 GB of data might take only 10-20 minutes with a LAN cable, while the same amount over Wi-Fi could take an hour or more, depending on the speed of your internet connection.
Step 6: Verify Data Transfer on PS5 Pro
Once the transfer is complete, check your PS5 Pro to ensure everything has successfully transferred:
Check Game Library: Go to Game Library on your PS5 Pro and confirm that your selected games have been successfully transferred. If anything is missing, you can download it from the PlayStation Store or try the transfer again.
Confirm Save Data: Open any of the transferred games to verify that your save data is accessible and working correctly.
Review Media Files: Navigate to Media Gallery to ensure all desired screenshots and video clips are available on your PS5 Pro.
Step 7: Re-download Purchased Content and Updates
While the transfer process will carry over most of your content, certain items—such as game patches or updates—may need to be downloaded again. Here’s what to do:
Download Game Patches: Open each transferred game and check for any available updates. Downloading the latest patches ensures that the games run smoothly on your PS5 Pro.
Reinstall Untransferred Games: If you opted not to transfer certain games, you can go to Game Library > Your Collection to download any previously purchased content directly to the PS5 Pro.
Restore Backups (If Necessary): If you used an external drive or cloud storage for backup, you can restore any additional files as needed.
Step 8: Final Adjustments and Customizations
Once all your data is transferred, take some time to set up and customize your PS5 Pro to fit your gaming style:
Adjust Settings: Open Settings and review your display, audio, and controller preferences. You may want to fine-tune settings to optimize the PS5 Pro’s enhanced performance capabilities.
Log In and Sync Your Trophies: Make sure your PSN account is synced, and confirm that all your trophies have transferred over. Go to Trophies in the Control Center to check.
Reconfigure Game Preferences: If your games support customization options for performance (like resolution vs. frame rate modes), adjust each game individually to take advantage of the PS5 Pro’s power.
Troubleshooting Common Issues
If you encounter problems during the data transfer, try these troubleshooting tips:
Restart Both Consoles: Power cycle both the PS5 and PS5 Pro if the transfer freezes or fails.
Check Internet Connection: For Wi-Fi transfers, make sure your network is stable. If possible, switch to a wired connection for a more reliable transfer.
Free Up Storage: If you run into a storage issue on the PS5 Pro, delete unneeded files to create more space.
Read Also: Can I Transfer Ps5 To Ps5 Pro With An External Hard Drive?
Conclusion
Transferring data from a PS5 to a PS5 Pro may seem intimidating, but following these steps can make it a smooth and straightforward process. The key is to prepare both consoles, select the data you want, and choose the right transfer method for your setup. With this guide, you’ll have everything you need to complete the process efficiently, allowing you to enjoy the enhanced graphics, faster performance, and expanded features of the PS5 Pro without losing any of your previous gaming progress.


